Physical eSIM Setup ICCID No.898523...
Physical eSIM Setup
On Android Phone:
-
Insert Your eSIM Physical Card
Insert your eSIM physical card into the SIM card slot (Slot 1) of your Android phone. -
Enable Data Roaming
Make sure that data roaming is enabled to access the Internet. -
Manage Your eSIM Profile via the EIOTCLUB APP:
-
Download the EIOTCLUB APP from Google Play and create an account to log in.
-
You will see a pop-up notification in the app:
“An EIOTCLUB physical eSIM card has been detected. Would you like to add it to your SIM card list? EID: ...”
Tap “OK” to add the eSIM.
-
An eSIM card slot will be added to your app account.
-
Tap “Remote” to manage your eSIM profile.
-
Tap the “+” icon to add a new eSIM profile:
-
Scan the QR code of your existing virtual eSIM or purchase a new one from the eSIM Shop.
-
After purchasing, click “Download” and wait a short moment for the new eSIM to be added to the slot.
-
-
Tap the Enable button next to the eSIM to enable or disable the eSIM.
-
-
Troubleshoot Connection Issues:
If the network does not connect successfully, check the APN settings:-
Go to Settings > Mobile Data > Access Point Names (APNs).
-
Tap the icon in the upper right corner and select New APN.
Enter the following APN details:
-
APN:
wbdata -
Username and password are not required.
-
Enable Data Roaming.
-
-
On GL-iNet Router:
-
Insert Your eSIM Physical Card into the Router
Compatible routers: Mudi (GL-E750), Mudi V2 (GL-E750V2), Spitz AX (GL-X3000), Puli AX (GL-XE3000), Puli (GL-XE300), Spitz (GL-X750), Collie (GL-X300B). -
Connect the Router to Wi-Fi
Open your preferred browser and go to 192.168.8.1 to access the GL.iNet Admin Panel. -
Ensure Your Router Has the Latest Firmware
Make sure the router is updated to the latest firmware for smooth eSIM operation. -
Manage Your eSIM Profile:
-
On the GL.iNet Admin Panel:
Navigate to APPLICATIONS > eSIM Manage to open the eSIM management application.
-
On the EIOTCLUB APP:
-
Download the EIOTCLUB APP from Google Play, and log in with your account.
-
Tap the “+” icon to add your physical eSIM (enter EID numbers).
An eSIM card slot will be added to your app account.
-
Tap “Remote” (Note: Restart your router if you receive the message: "Device not online. Please restart the device and make sure it is connected to the internet." After restarting, tap “OK”).
-
You can now manage your router eSIM profile via the app.
-
Tap the “+” icon to add a new eSIM profile:
-
Scan the QR code of your existing virtual eSIM or purchase a new one from the eSIM Shop.
-
After purchasing, click “Download” and wait for the new eSIM to be added.
-
-
Tap the Enable button next to the eSIM to enable or disable it.
-
-
-
Troubleshoot Connection Issues:
On the GL.iNet Admin Panel, tap “Internet” and click "Abort" on the eSIM profile.
Then try “Auto Setup” again to connect, or try “Manual Setup” and check the APN:-
APN:
wbdata -
Username and password are not required.
-
On Apple iPhone (Requires EIOTCLUB Card Reader):
-
Insert Your eSIM Physical Card into Your iPhone
Insert your eSIM physical card into your iPhone. -
Enable Data Roaming
Ensure that data roaming is enabled to access the Internet. -
Manage Your eSIM Profile Using the EIOTCLUB Card Reader:
-
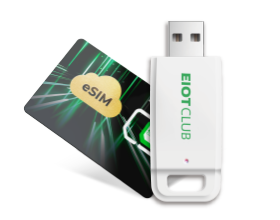
Insert your eSIM physical card into the EIOTCLUB Card Reader and plug it into the USB port on your PC.
-
Download the necessary software for the card reader from the EIOTCLUB website.
-
Click “Read” to retrieve the eSIM card information.
-

-
Click “Download” to add more eSIM profiles to the eSIM physical card.

-
Choose the eSIM profile you want to use and click “Enable” to activate it.
-
Finally, insert the eSIM physical card back into your iPhone.
4.Troubleshoot Connection Issues:
If the network does not connect successfully, check the APN settings:
-
Go to Settings > Cellular > Cellular Data Network and enter the following APN:
-
APN:
wbdata -
Username and password are not required.
-
Enable Data Roaming.
-





 eSIM
eSIM
 Refill